Tydraig.Com
A random collection of objects and subject I am interested in… or as my wife
would say obsessed with !!
Amateur Radio
Antenna project
Ridged Cobweb for QTH

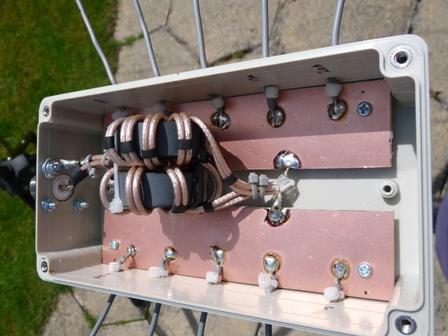
After the success of my first cobweb antenna I decided to build a rigid version for my home QTH, the design this time is based on one by G3TXQ.The basic design is the similar to my portable version but this one uses a 1:4 Guanella current balun, allowing single wire elements instead of figure of eight wire and the need for tapping points.
The aim of this construction was to make a strong design but maintain a low weight, I have tried to use readily available components for repeatability but also trying to keep the cost down to around £100.
I have put together a parts list which can be found here (Cobweb parts) some materials must be bought in minimum quantities such as the fibre glass tube and equipment wire, but as with all homebrew project you can adapt these to suit your pocket. the only thing I would advise is to make sure the eliment wire diameter is always 1mm sq as changing this will effect the velocity factor and change the properties of the antenna.


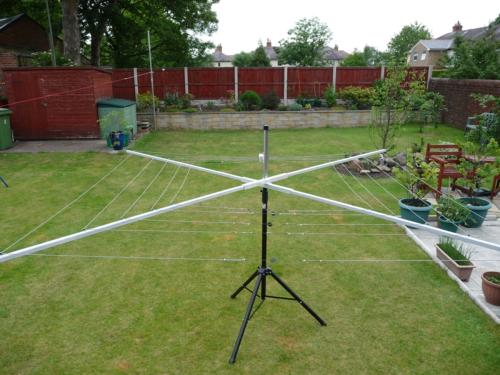

Assembly Start
Prior to wiring up
Wire lengths and positions
Band Wire Length Centre to Corner distance 20m 201” 72.25”
17m 157.5” 56.75”
15m 35” 48.25”
12m 114” 40.25”
10m 110.5” 34.75”
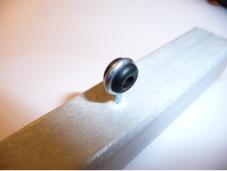
I used 2.5 x 25mm eyebolts to support the element wires, this made the positioning along the support arms much more accurate and I also fitted rubber grommets into the eyebolt for extra protection to the wire.
There are plenty of designs available for the cobweb antenna on the Internet, I have adapted Steve Hunt’s (G3TXQ) version to suit my requirements, his design can be found on his web site. He has much more information on the build process such as the balun construction which is pretty standard and easy to follow.
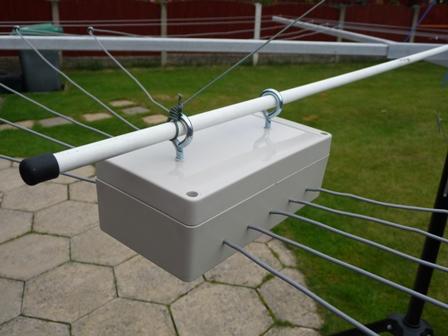
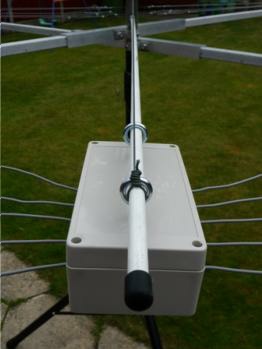
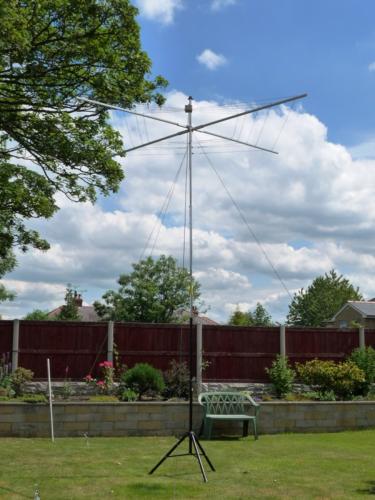
The finished Antenna
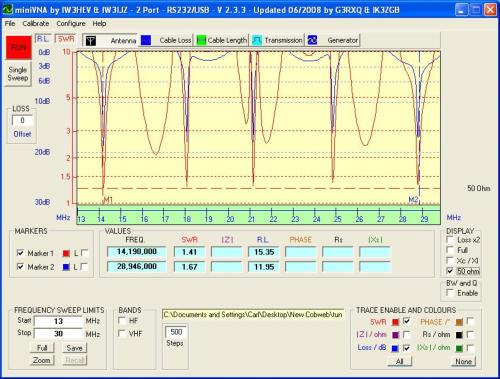
Testing and Tuning
The final stage was the testing and tuning of the antenna, this was made easier with the use of my MiniVna network analyser.
It gave me graphical information on each of the five bands the antenna was to be designed for and it’s performance within each of the five ranges.
Initially the tuning was a little low on each ot the bands, I had made an allowance for any required change when I was repairing the wire elements by adding 3” to the length of each wire as it is always easier to cut back then to add extra wire, my preferred method of tuning is by folding back the extra length to increase the frequency if required.as was the case on this particular build.
Pre-
Post-
So there is it, all I have to do now is find a permanent mounting position in my garden...