Tydraig.Com
A random collection of objects and subject I am interested in… or as my wife
would say obsessed with !!
Amateur Radio
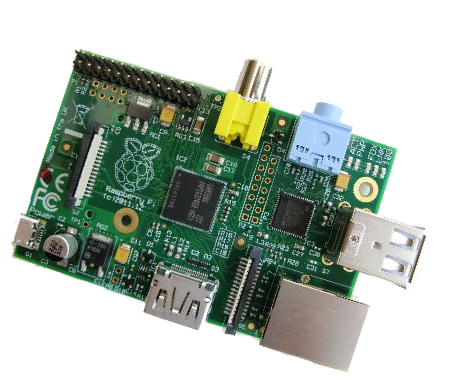
Raspberry Pi ADS-

ADS-
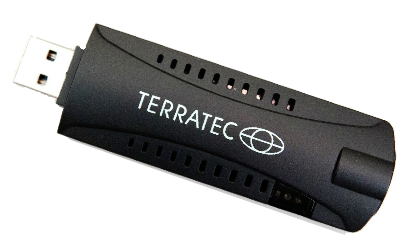
I wanted to have a go at using a DTV dongle to decode ADS-
I am running my Funcube Pro dongle to monitor the air band frequencies at the same time, it’s pity the Funcube bandwidth is only 48Khz not sufficient for data and is not only insufficient but it also has a gap tuning range between around 1060Mhz to 1140Mhz.
It Lives !!
I managed to get the DVB-
The antenna I use is my discone which is located in the attic, it is fed to both
the DVB-


Raspberry Pi SDR
I am pleased with the windows version of the software but I have had a Raspberry Pi sitting on my desk for months and I needed to find a use in my station for it, well it just had to be an RTL_ADSB Server.
After doing a bit of research on Peter 2E0SQL’s website, I decided to take the plunge.
I Started off with a clean install of the 2012-
Before I installed the RTL drivers, I installed the following dependencies by typing
the following commands:
sudo apt-
sudo apt-
sudo apt-
sudo
apt-
I use a terminal program called putty to run a telnet session which gives you the command prompt as I don’t use a monitor & keyboard attached to the Raspberry Pi.
Then I installed the RTL drivers using the following commands:
git clone git://git.osmocom.org/rtl-
cd rtl-
mkdir build
cd build
cmake ../
make
sudo
make install
sudo ldconfig
As I am using tightvncserver I ran startx and used the graphical user interface to make the next stage easier, I located the RTL directory using the file manger, this is where the drivers where downloaded and copied the rules file into the etc/udev/rules.d directory, you must do this for it to work.
Next I plugged in the RTL-
The confusing part of this is that the rtl_tcp -
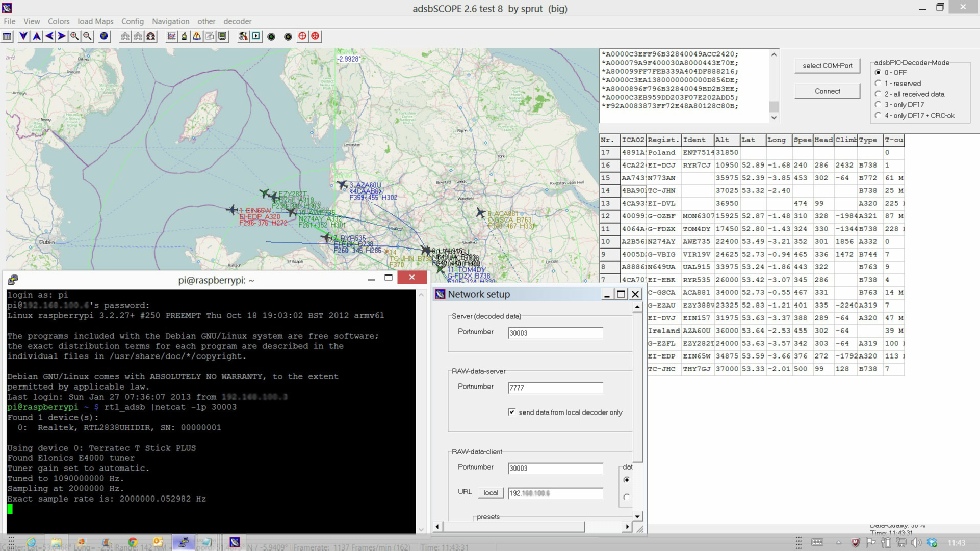
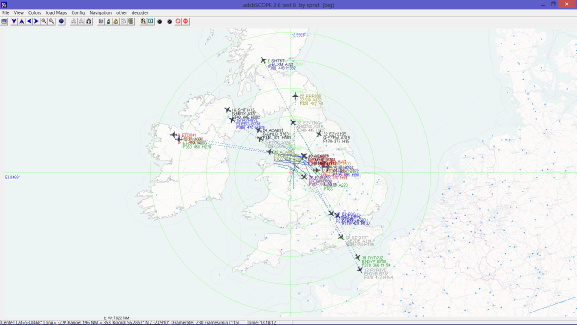
On my client machine I configured the adsbSCOPE software to listen to the IP address example (192.168.0.150) & port (30003).
I find that I need the Putty telnet client running in the background to keep the session open, but when I start the adsbSCOPE software starts decoding the data instantly.
See the screen shot below for details of how it looks when running.